Improve your knowledge of the algorithm training process with IKOSA AI.
IKOSA AI helps you develop custom bioimage analysis algorithms without any coding. To help you achieve this we prepared a simple guide for you to go through the individual steps of your algorithm training.
What to expect from this page?
📑 Preparation for algorithm training
Select images on your computer
You can train your algorithms on 2D or multichannel images.
Depending on the training type you are willing to choose, you need to know in advance what image types and formats are supported:
Semantic Segmentation | Instance Segmentation | |
|---|---|---|
2D | 2D | Multichannel |
standard and WSI RGB and grayscale 8bit | standard and WSI RGB and grayscale 8bit and 16bit | standard and WSI RGB 8bit and 16bit max. 10 channels |
Important: make sure your image file formats are supported by IKOSA Portal File formats
Important: Non-WSI formats of 2D and multichannel images are supported up to a maximum image size of 625 Megapixel (e.g. 25,000 x 25,000 Pixel).
Login to IKOSA
Before you start training your own algorithms, you need to log in to IKOSA https://app.ikosa.ai/auth/login and navigate to the IKOSA AI page.
Upload images
Annotate images
How-to annotate an image? and How-to draw a ROI?
In addition, we explain how to correctly use annotations and ROI(s) for your algorithm training here: https://kmlvision.atlassian.net/wiki/spaces/KB/pages/3202252814#How-to-draw-ROI-for-algorithm-training-with-IKOSA-AI%3F%5BinlineExtension%5D
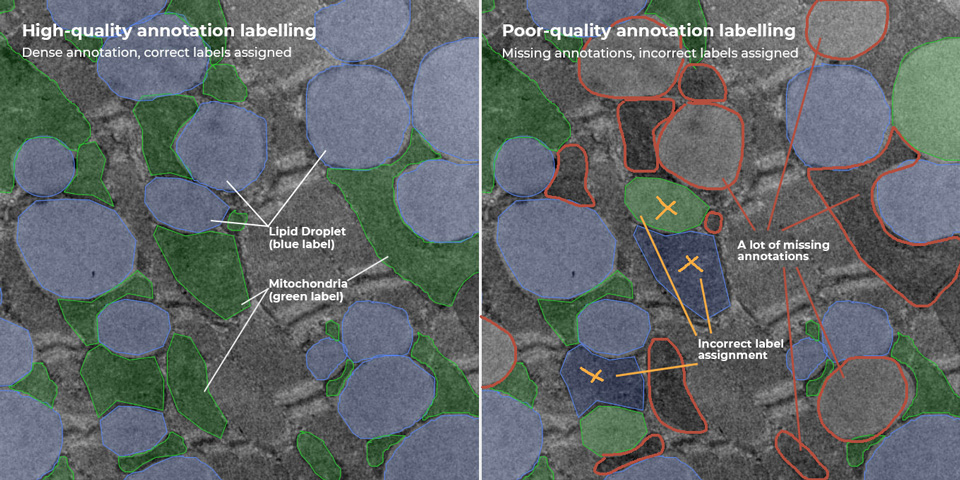
Basic rules for a successful training
The training accuracy depends on the quantity and quality of annotations.
The minimum training requirements are:
Create a label set including at least 1 label (e.g. for a specific cell or tissue type) and
Annotate at least 2 images, meaning all relevant objects you would like to segment have to be annotated and labeled (e.g. all lipid droplets, mitochondria as shown in the figures below)
However, the prerequisites for an accurate application depend largely on the complexity of the use case. The complexity typically increases with the number of labels and the difficulty to differentiate between objects. Greater complexity usually requires more images and more annotations.
📑 The IKOSA AI wizard Step-by-step
First, start the IKOSA AI wizard.
Important:
This step-by-step overview covers only the semantic segmentation and instance segmentation training types.
We use a demo project to show you all the steps.
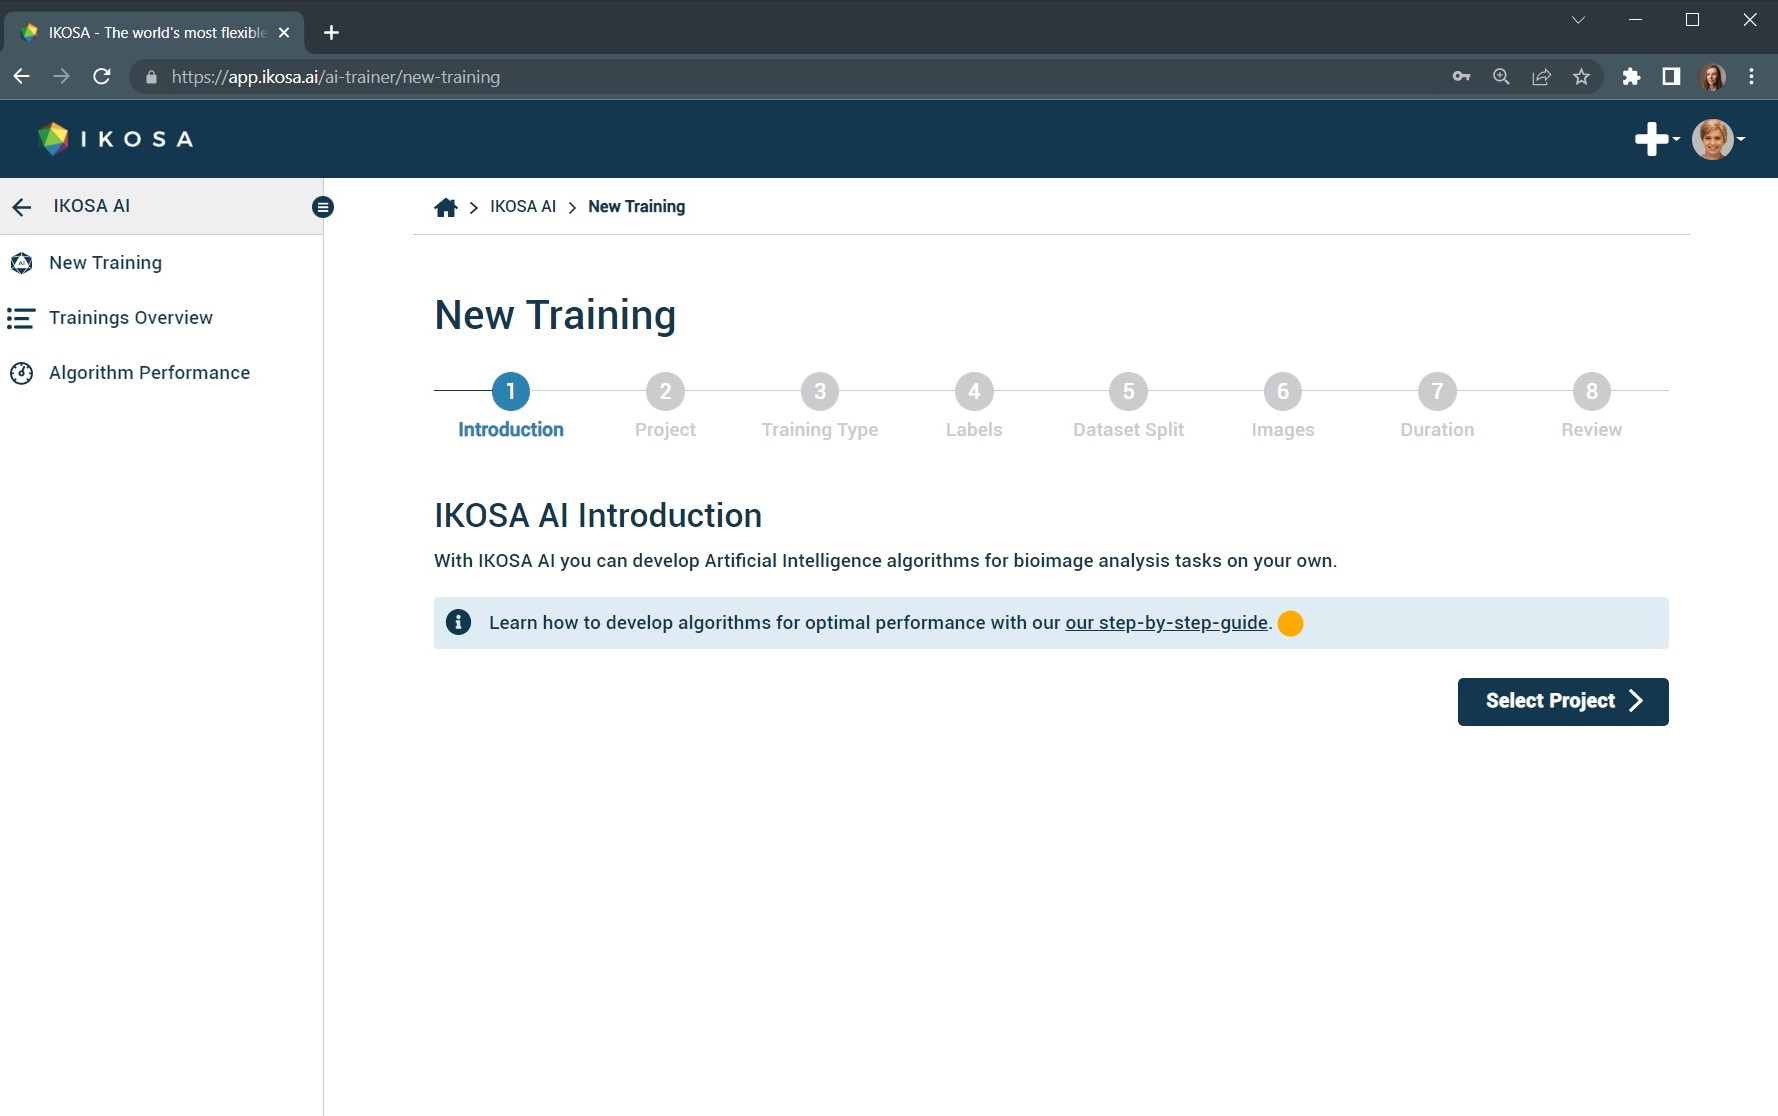
1. Read the introduction
Before starting a new training, learn all about IKOSA AI here in this article. The link from the IKOSA AI Wizard leads you to this page.
2. Select project
Select the project you have just prepared by annotating/labeling the data.

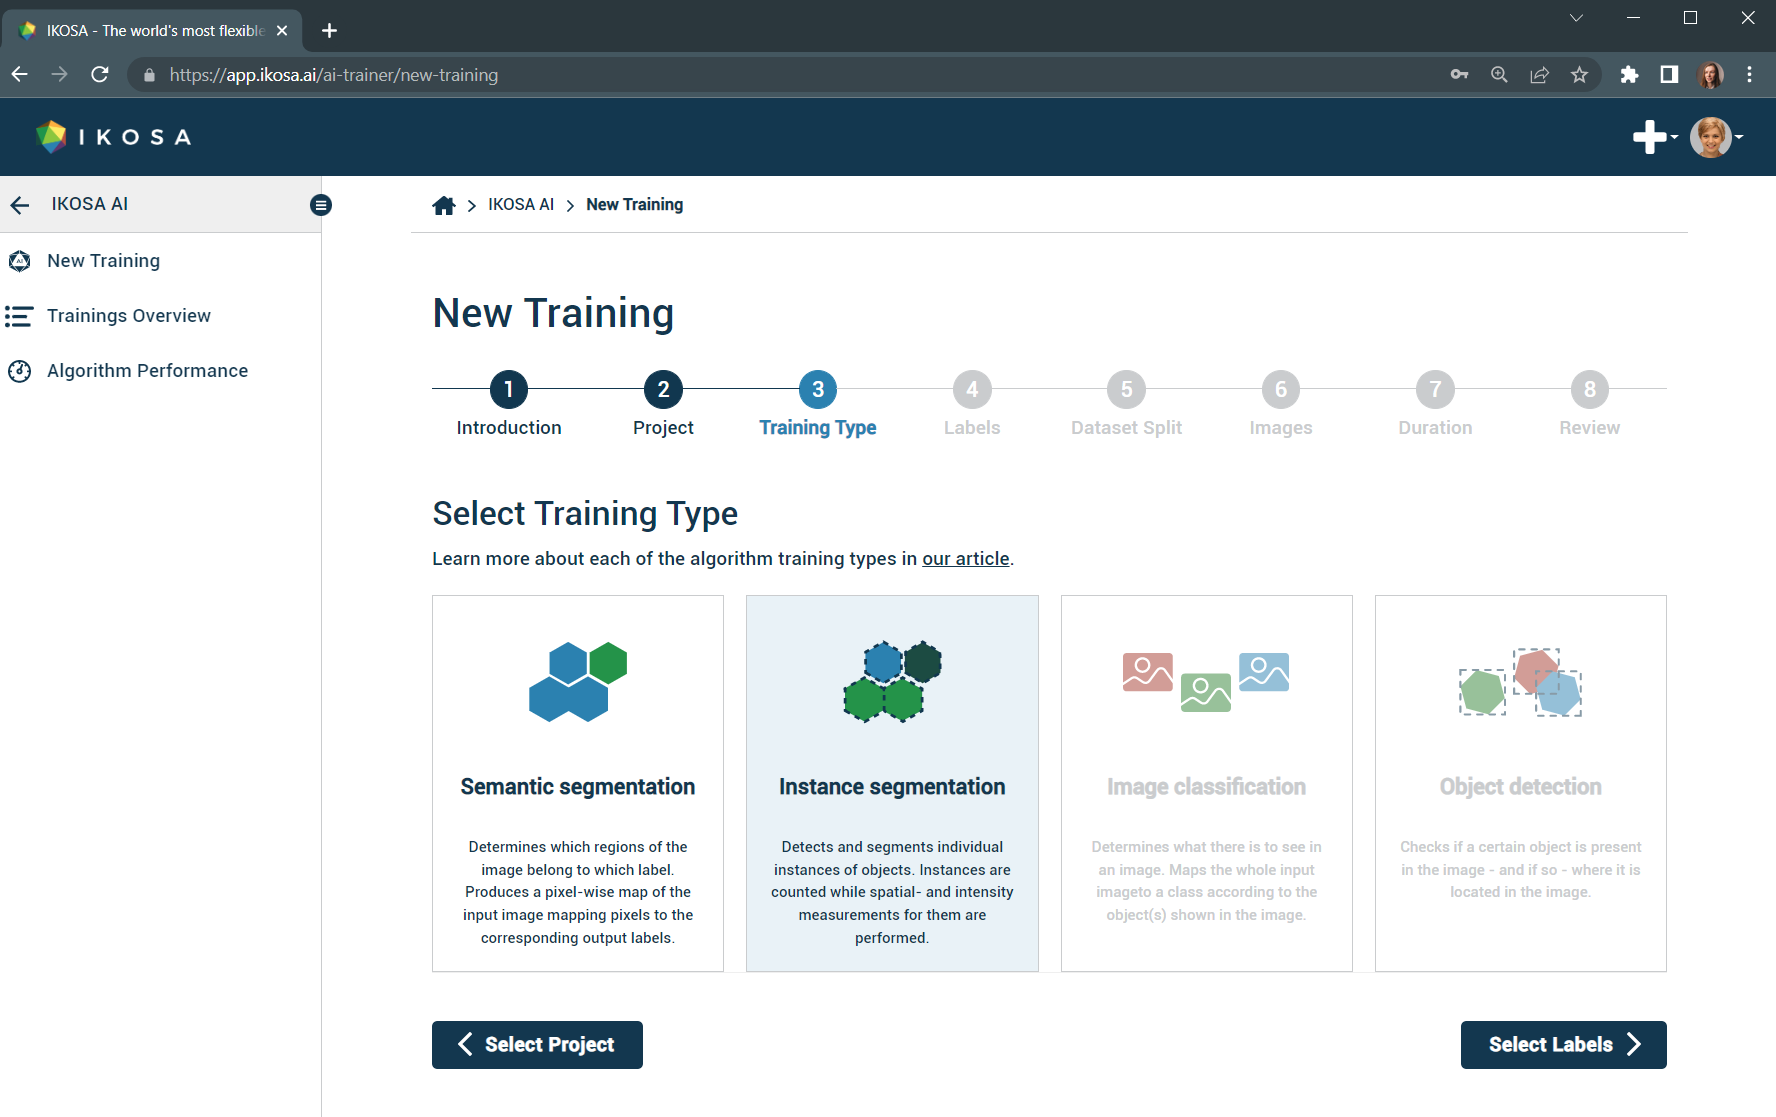
3. Select training type
Currently, IKOSA AI covers semantic and instance segmentation tasks only. However, image classification and object detection will also be supported in the near future.
Important: if you want to train an algorithm on multichannel images, please select instance segmentation training type as semantic segmentation doesn’t support it.
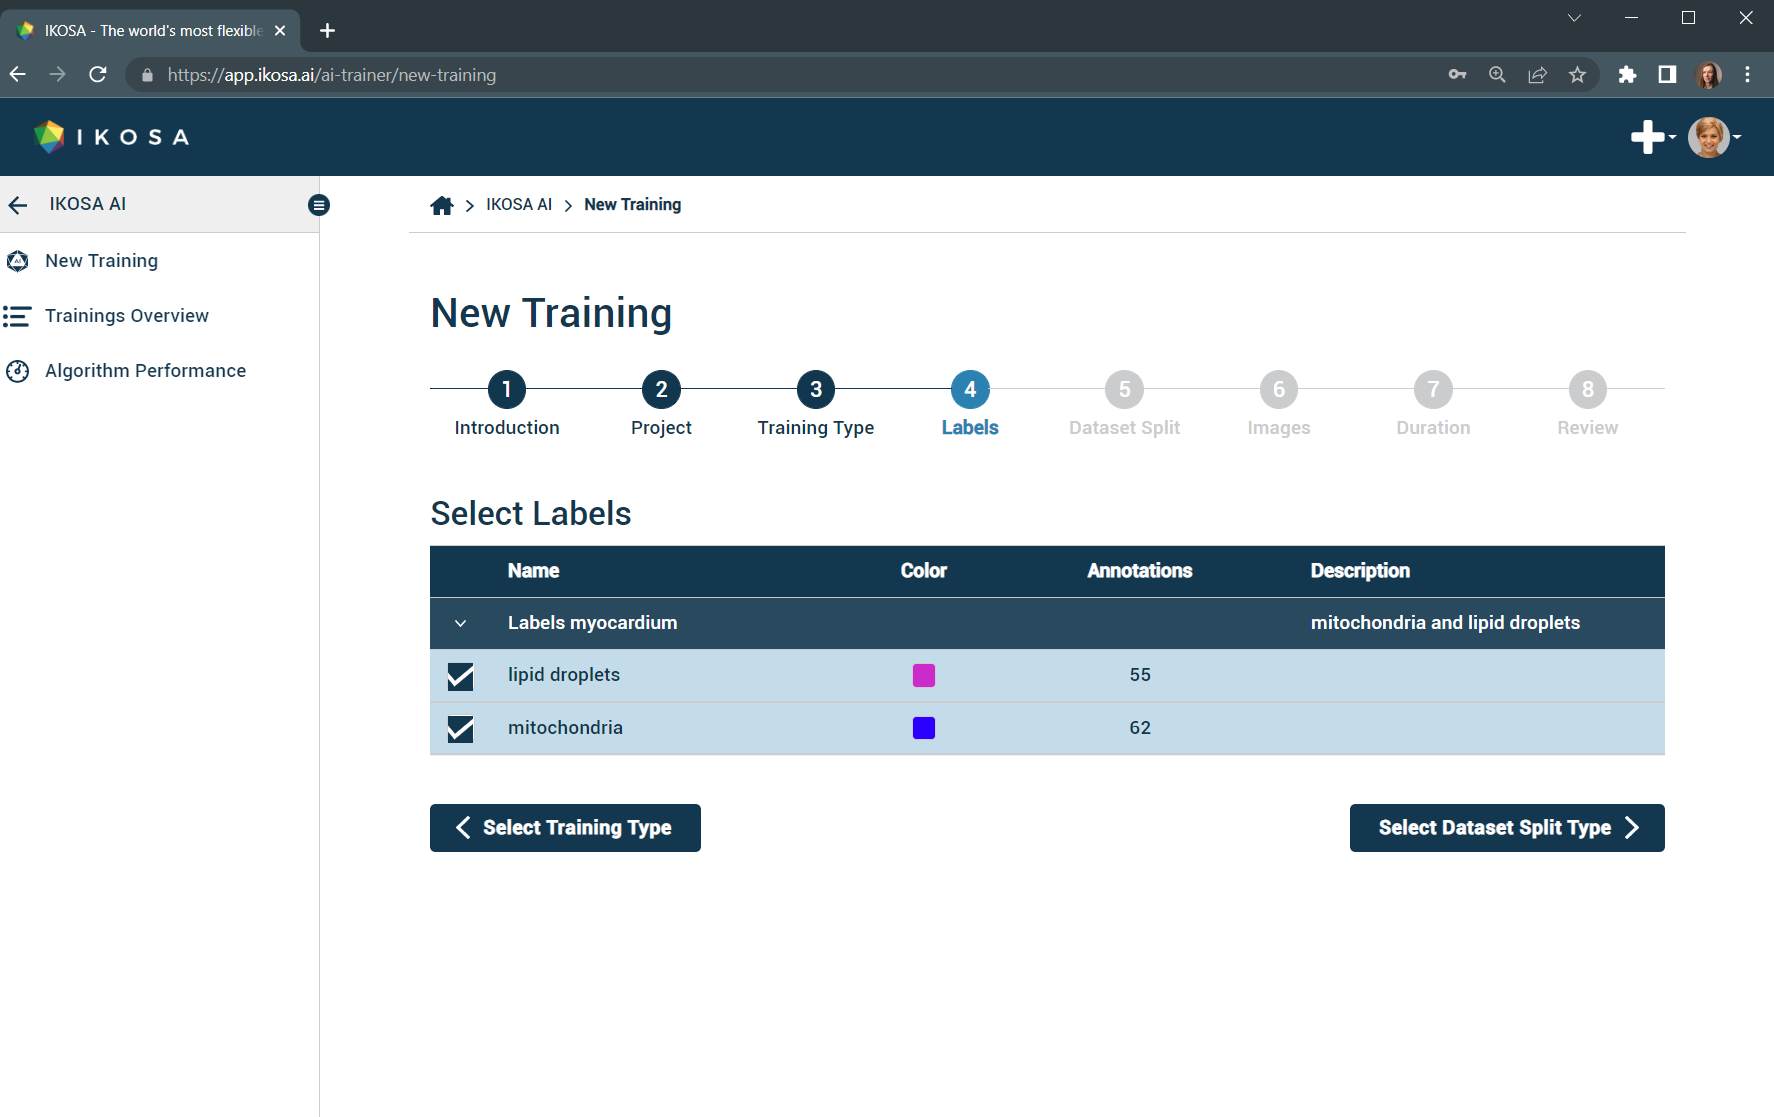
4. Select labels
Select only the labels relevant to the training.
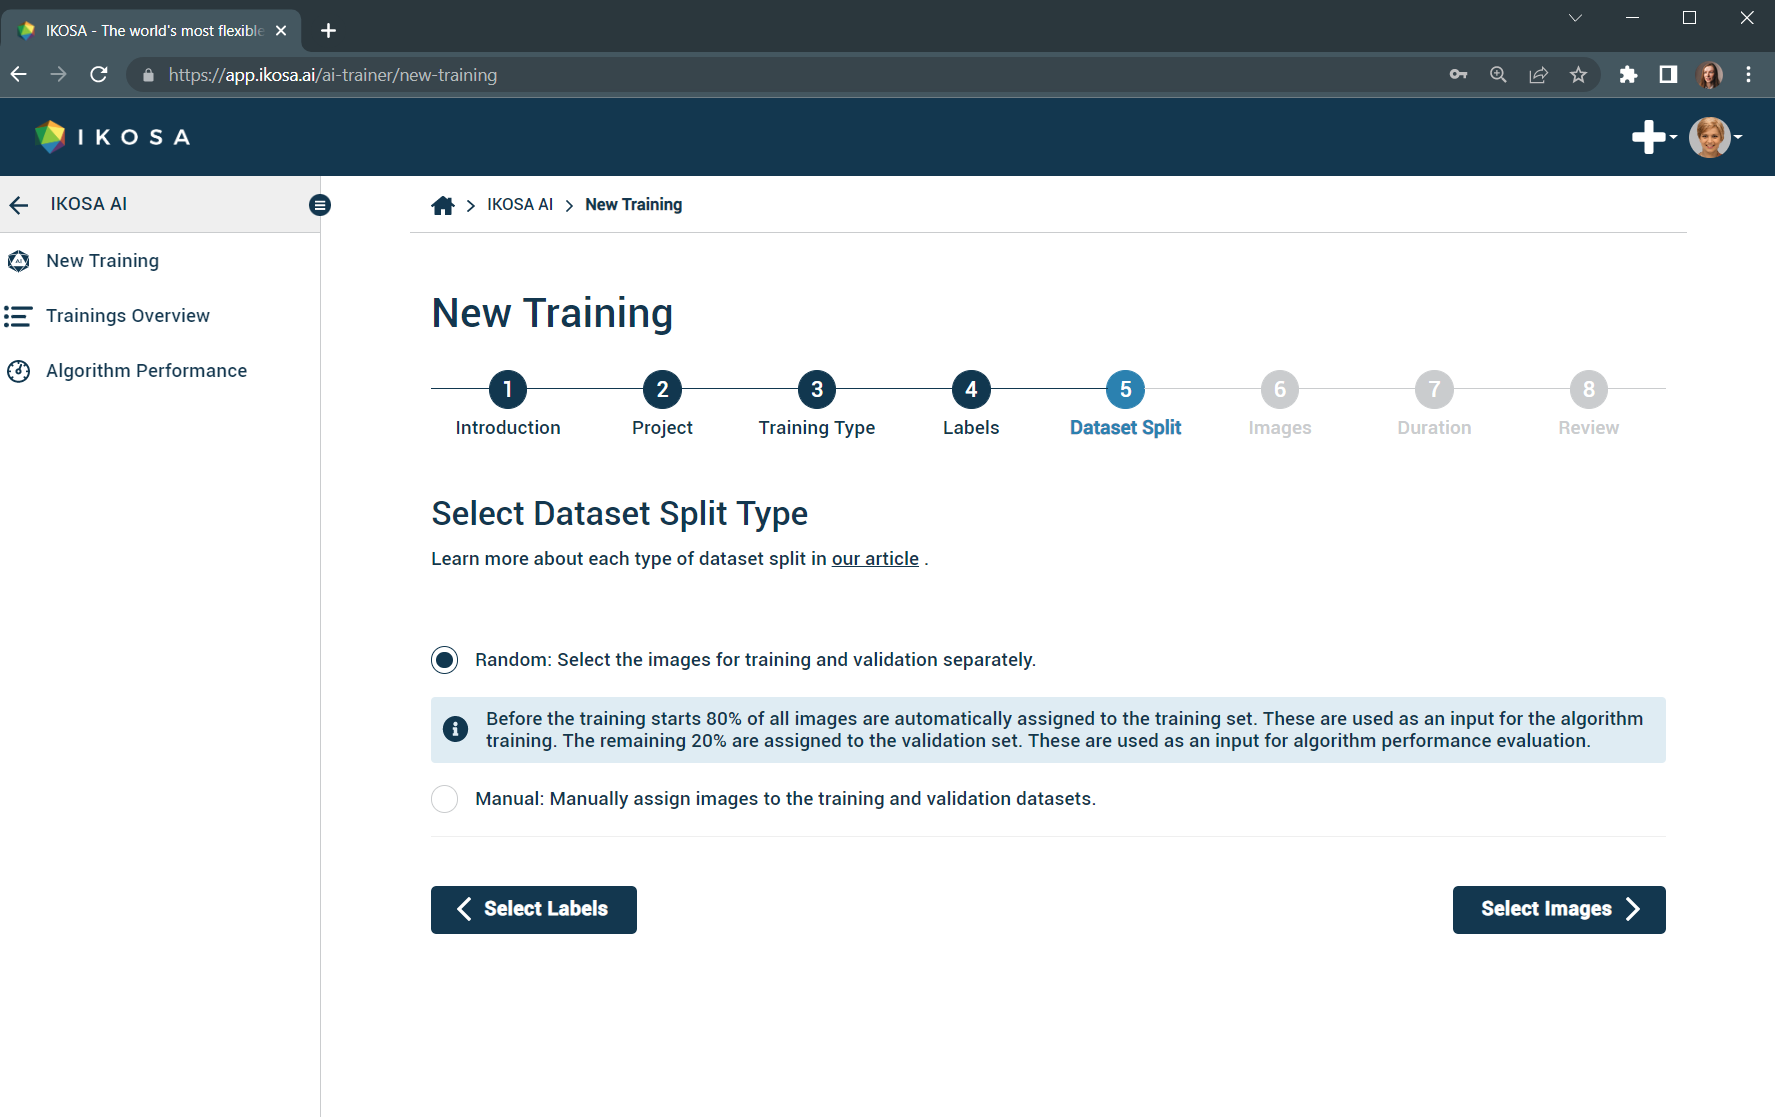
5. Select dataset split
Random dataset split: selecting your images for training and validation all at once.
Manual dataset split: selecting your images for training and validation separately.
Please note:
All features belonging to a label must be annotated - features that are present, but not annotated introduce counterfactual information into the training algorithm and impair the results.
Images with annotations are split into training- and validation datasets (depending on which dataset split you choose this will happen automatically or manually) - so be sure to include enough of them.
The larger the used dataset, the better the expected results.
Images without features (e.g. only background, no annotation) can be included as well- these images can help the model distinguish between foreground and background and especially allow for trainings based on label categories very similar to the background.
Important: if you have annotated your images mostly within ROI(s), then you should consider the option of training your algorithm on ROI(s) instead of the whole image. If an image does not contain any ROI(s) but you still select this function, the whole image will be used instead.
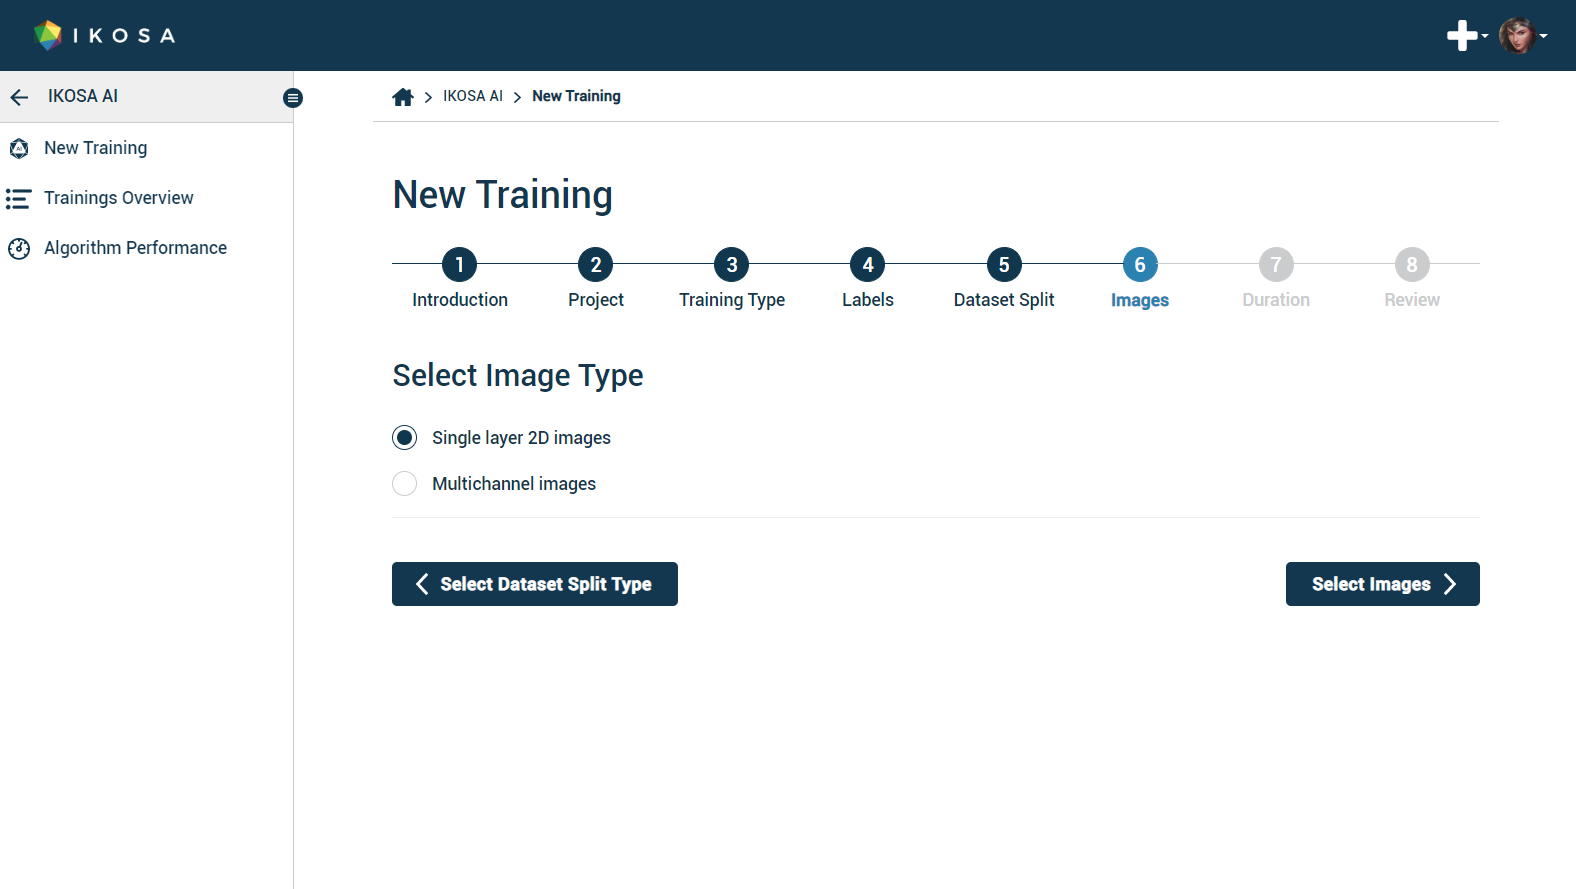
6. Select images
Select image type
Important: The image type option will only be enabled if an instance segmentation training type has been selected.
Select between 2D and multichannel images.
Selecting images in random dataset split
80% of your selected images will be automatically assigned to the training set, while 20% of the images will be assigned to the validation set, on which the performance of your trained algorithm will be evaluated.
Selecting images in manual dataset split
Select at least 1 training and 1 validation image. Both of them must contain annotations.
Important: If images are selected manually, the validation set has to:
include all detectable labels
be similar in composition and quality to the training set
If you are not sure how to conduct manual selection, then we would recommend applying random split since the manual selection of images might introduce unwanted bias.
Background recognition
As stated above, images (or ROI(s)) without annotations of the selected labels can also be included in the training. This provides the algorithm training with a 'baseline' for a more reliable distinction between the background and features that need to be labeled.
The algorithm will autonomously learn how the background differs from the foreground. Even if you do not provide separate background images, the algorithm will obtain information on what the background looks like based on the spaces in between annotations.
Uploading images showing background only helps the algorithm learn what the background looks like, even when there are no objects with labels assigned present in the foreground. This also helps the algorithm learn what patterns form in the background around a foreground object.
You should be careful what unannotated images you include in the training as examples for background only. If foreground objects are present in those images, the algorithm will later not be able to make a proper distinction between background and foreground areas.
Important: Make sure these images contain only background, as unlabeled features introduce counterfactual information into the trained algorithm.
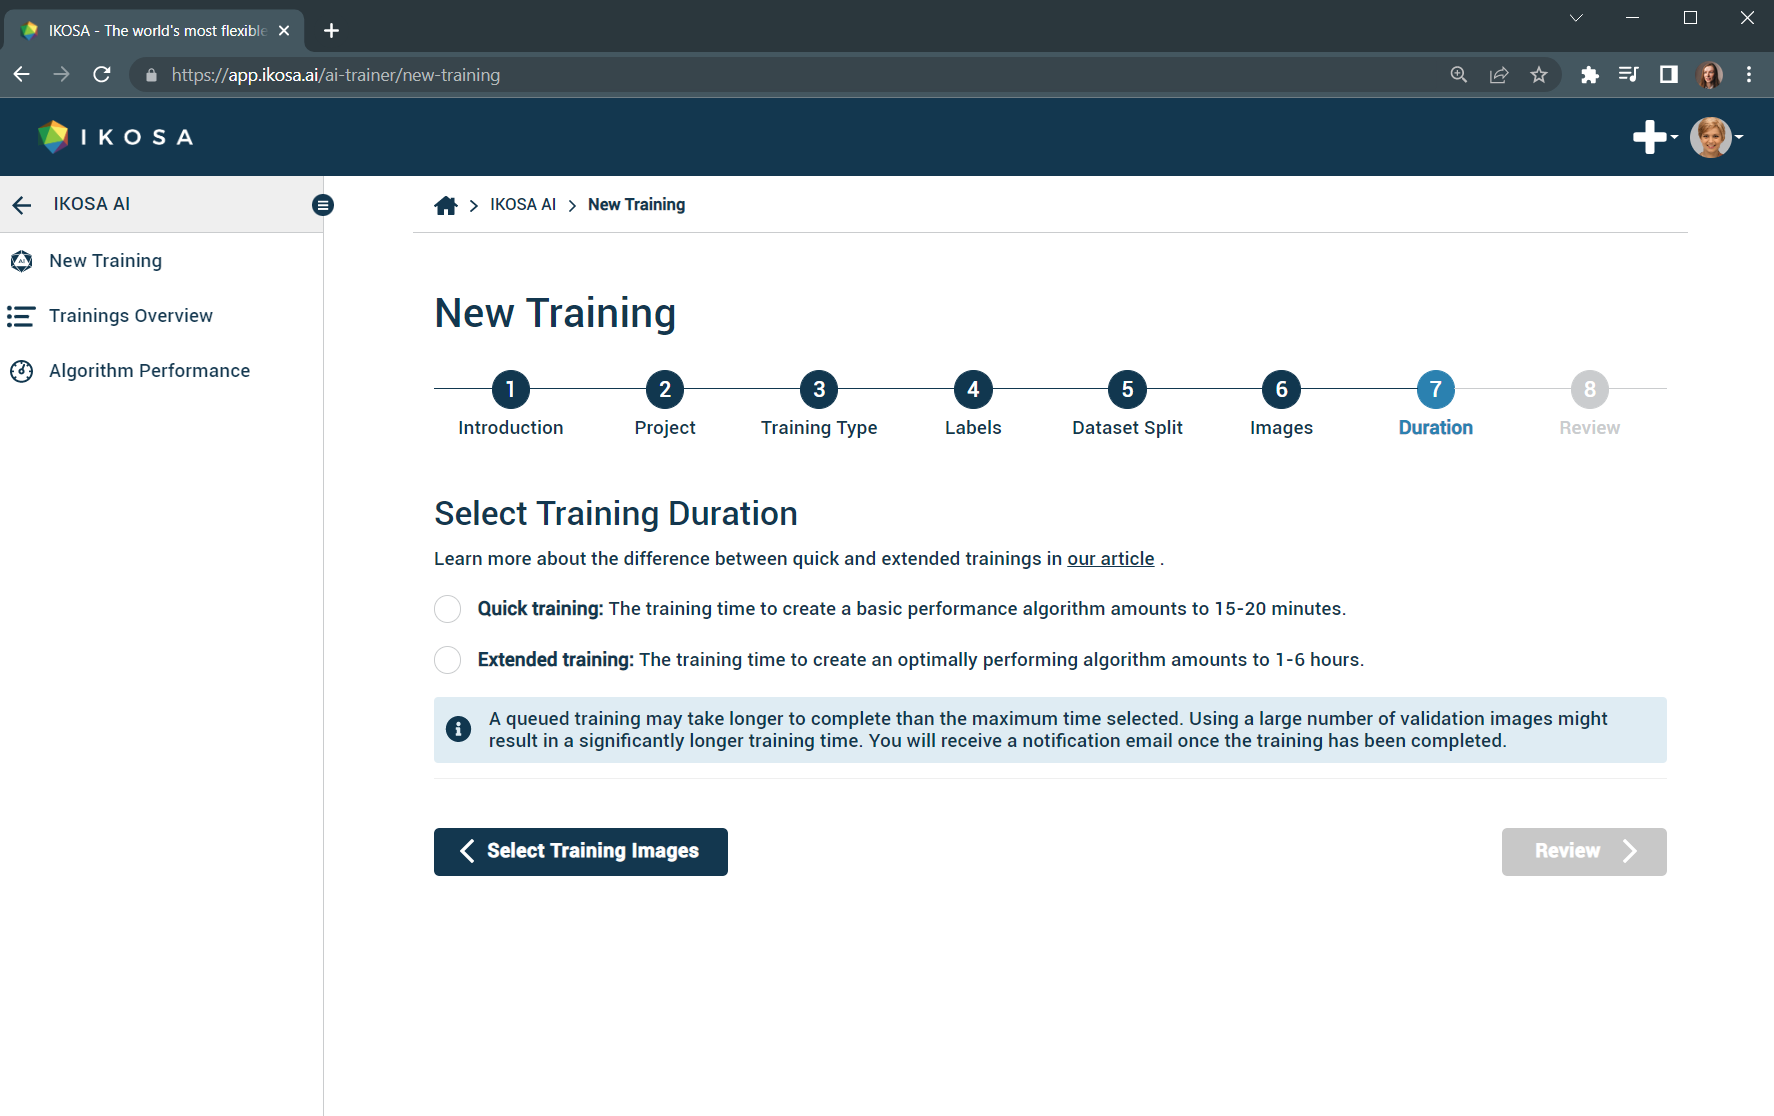
7. Select training duration
For an initial draft of an algorithm, we recommend using the quick training option. In this way, you can quickly get a first impression of the performance of the algorithm and check if more images need to be included in the training set.
The extended training option is recommended as a second refinement step and can yield a significant improvement in dice coefficient (depending on the data set) providing you with even better results.
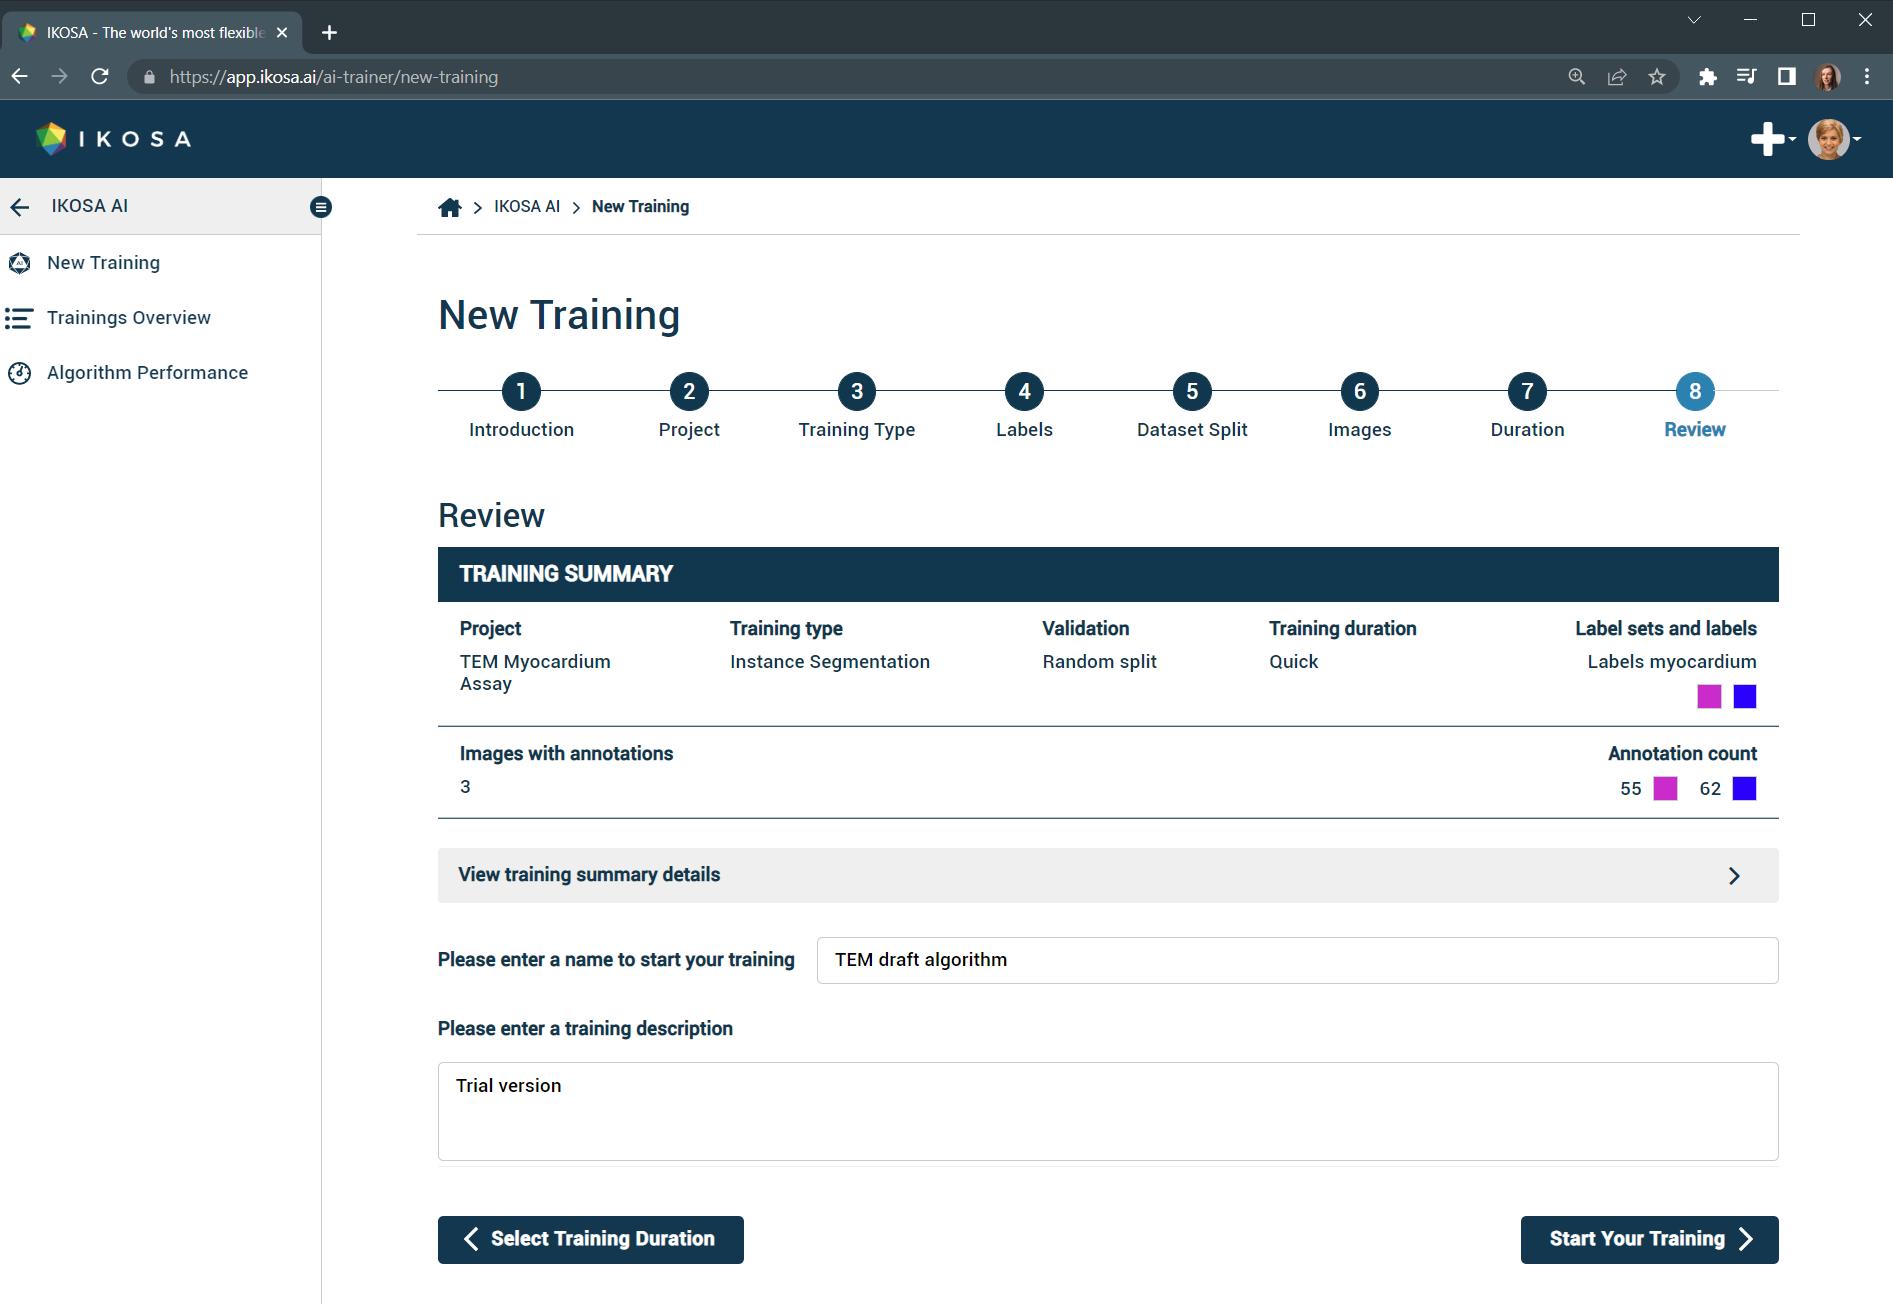
8. Review your selections and start the training
Review your selections before starting your algorithm training.
Give your training a name and start it!
Wait until the training is completed
You can track the progress of your active trainings.
Please note: your training might be queued and an estimated time until the completion of the training is displayed.
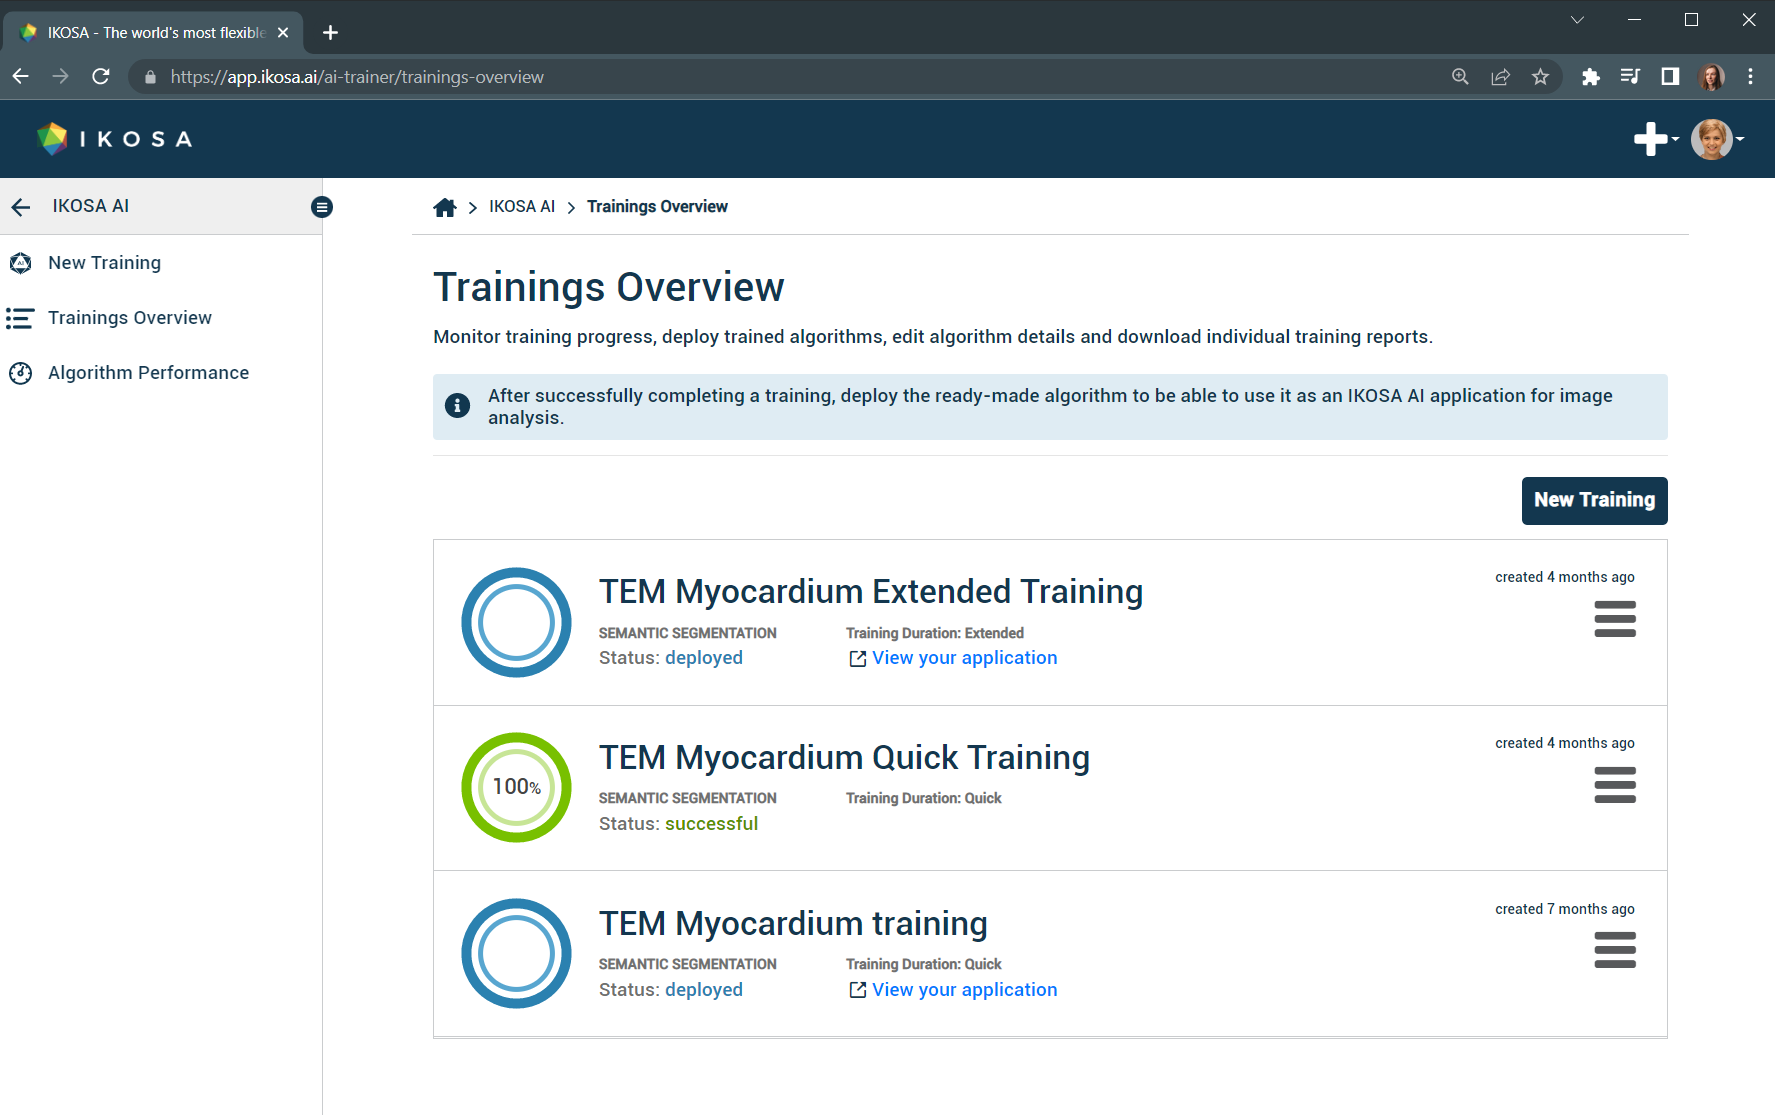
📑 Overview of the results
As soon as the training is completed, you will receive a notification email. Then you can download the training report and review the algorithm training performance.
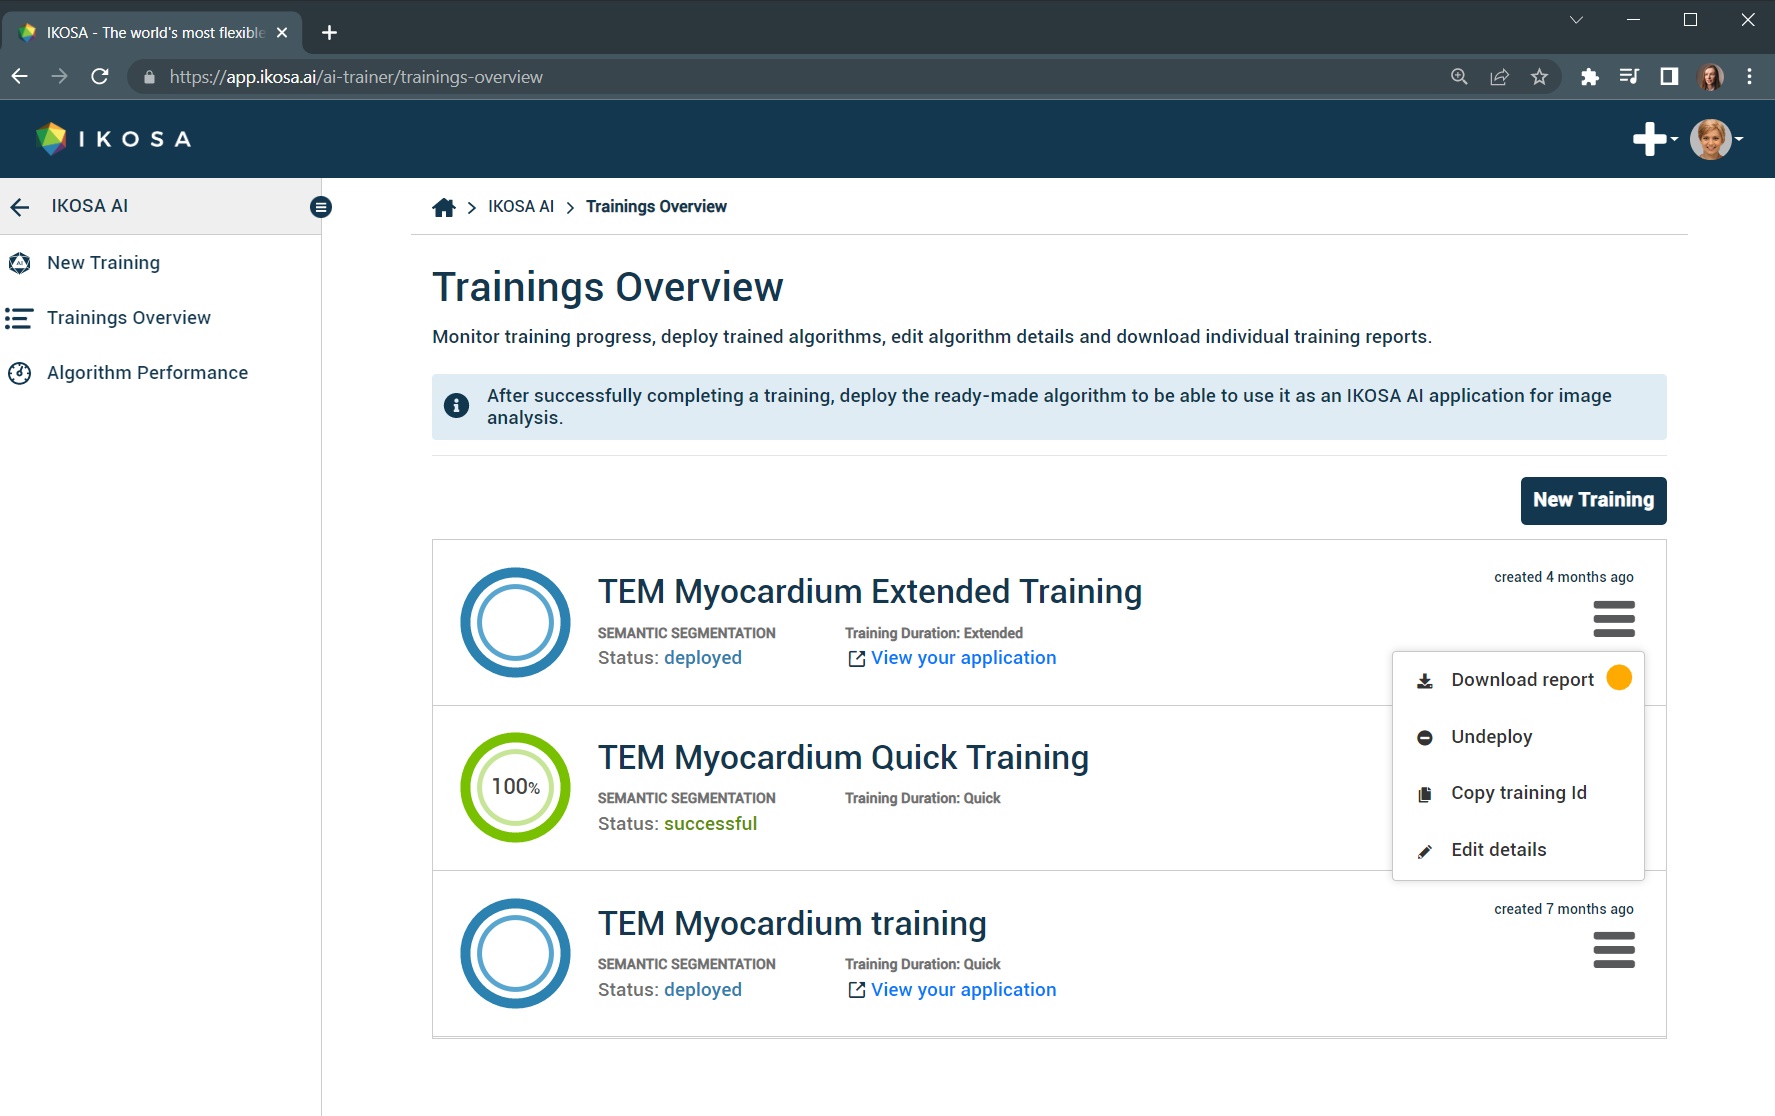
The downloadable zip folder contains:
the report as a PDF file with quantitative outcomes
qualitative results as validation visualizations

If you are satisfied with the performance of the algorithm and have thoroughly checked the report, you can deploy your model for further use: How-to deploy and use a trained algorithm?
If you need any help with that, we have prepared an extra section with a couple of how-to articles Interpretation of training results.
Share this information with your team members/colleagues and discuss your next training. Enjoy your algorithm training!
If you still have questions regarding your algorithm training, feel free to send us an email at support@ikosa.ai. Copy-paste your training ID in the subject line of your email.