Improve your knowledge of the application training process with IKOSA AI.
IKOSA AI helps you develop custom microscopy image analysis applications without any coding or AI knowledge. To help you achieve this we have prepared a simple guide for you to go through the individual app training steps.
What to expect from this page?
| Table of Contents | ||||||||||||
|---|---|---|---|---|---|---|---|---|---|---|---|---|
|
📑 App training preparation
Select images on your computer
You can train your applications on 2D or multichannel images.
...
| Note |
|---|
Important: Non-WSI formats of 2D and multichannel images are supported up to a maximum image size of 625 megapixels (e.g. 25,000 x 25,000 Pixel). |
Login to IKOSA
https://app.ikosa.ai/auth/login
Prepare your project
...
📍 Project preparation rules
Use data with a high diversity of feature appearances.
Larger datasets provide better training results. However, small and medium datasets will work just fine if you prepare your images correctly.
The greater complexity of your data requires more images.
| Note |
|---|
Important The image size doesn't significantly impact the training process, but rather the feature size does. For example, if you use images with 512x512px with features averaging 30px in diameter, your trained app will function effectively even on very large images, as long as the features remain around 30px. |
...
Prepare your images
...
How to draw ROI(s) for application training with IKOSA AI?
...
📍 Image preparation rules
🏷️ Label set
Create a label set including at least 1 label (e.g. for a specific cell, tissue, or staining type)
| Info |
|---|
Please note If you're training an app with multiple labels, aim to balance the number of annotations across each label. The closer the number of annotations per label is to one another, the better the application's performance will be. |
✏️Labeling, annotation and regions of interests
Use fully annotated and labeled images or ROIs to train your app.
...
Moreover, the training will run through such “multiplied” annotations more often than the other ones, effectively giving them a higher importance in the training process.
...
👁️ Background recognition
The background of an image is an area that DOESN’T CONTAIN the features required for the app training. You add them to help the app differentiate between background and features to recognize, especially when they are very similar.
Background images/ROIs can be added at step 6 of the training process.
| Info |
|---|
FAQ Is it an obligation to have background images or background ROIs? No! The trained app will autonomously learn how the background differs from the features. Even if you do not provide separate background images or background ROIs, the app will obtain information on what the background looks like based on the spaces in between annotations. I don’t provide any background images or background ROIs. What is the sufficient amount of background area within an image or an ROI? Whether you use ROI(s) or not, the greater the amount of non-annotated background area available for application training, the better the resulting model will be. What if I don’t have images only with background? You can dedicate some images that have background and present features:
|
...
| Note |
|---|
Important:Ensure that both background images or background ROIs contain only background, as any unintentionally included unlabeled features introduce misleading information into the trained application. |
...
📑 The IKOSA AI wizard Step-by-step
Go to the IKOSA AI section.
| Note |
|---|
Important:
|
1. Read the introduction
Before starting a new training, learn all about IKOSA AI here in this article. The link from the IKOSA AI Introduction leads you to this page.
...
2. Select project
Select the project you have just prepared by annotating and labeling the data.
...
3. Select training type
Currently, IKOSA AI covers semantic and instance segmentation tasks only.
| Note |
|---|
Important:If you want to train an application on multichannel images, please select instance segmentation training type as semantic segmentation doesn’t support it. |
...
4. Select labels
Select labels relevant to the training.
...
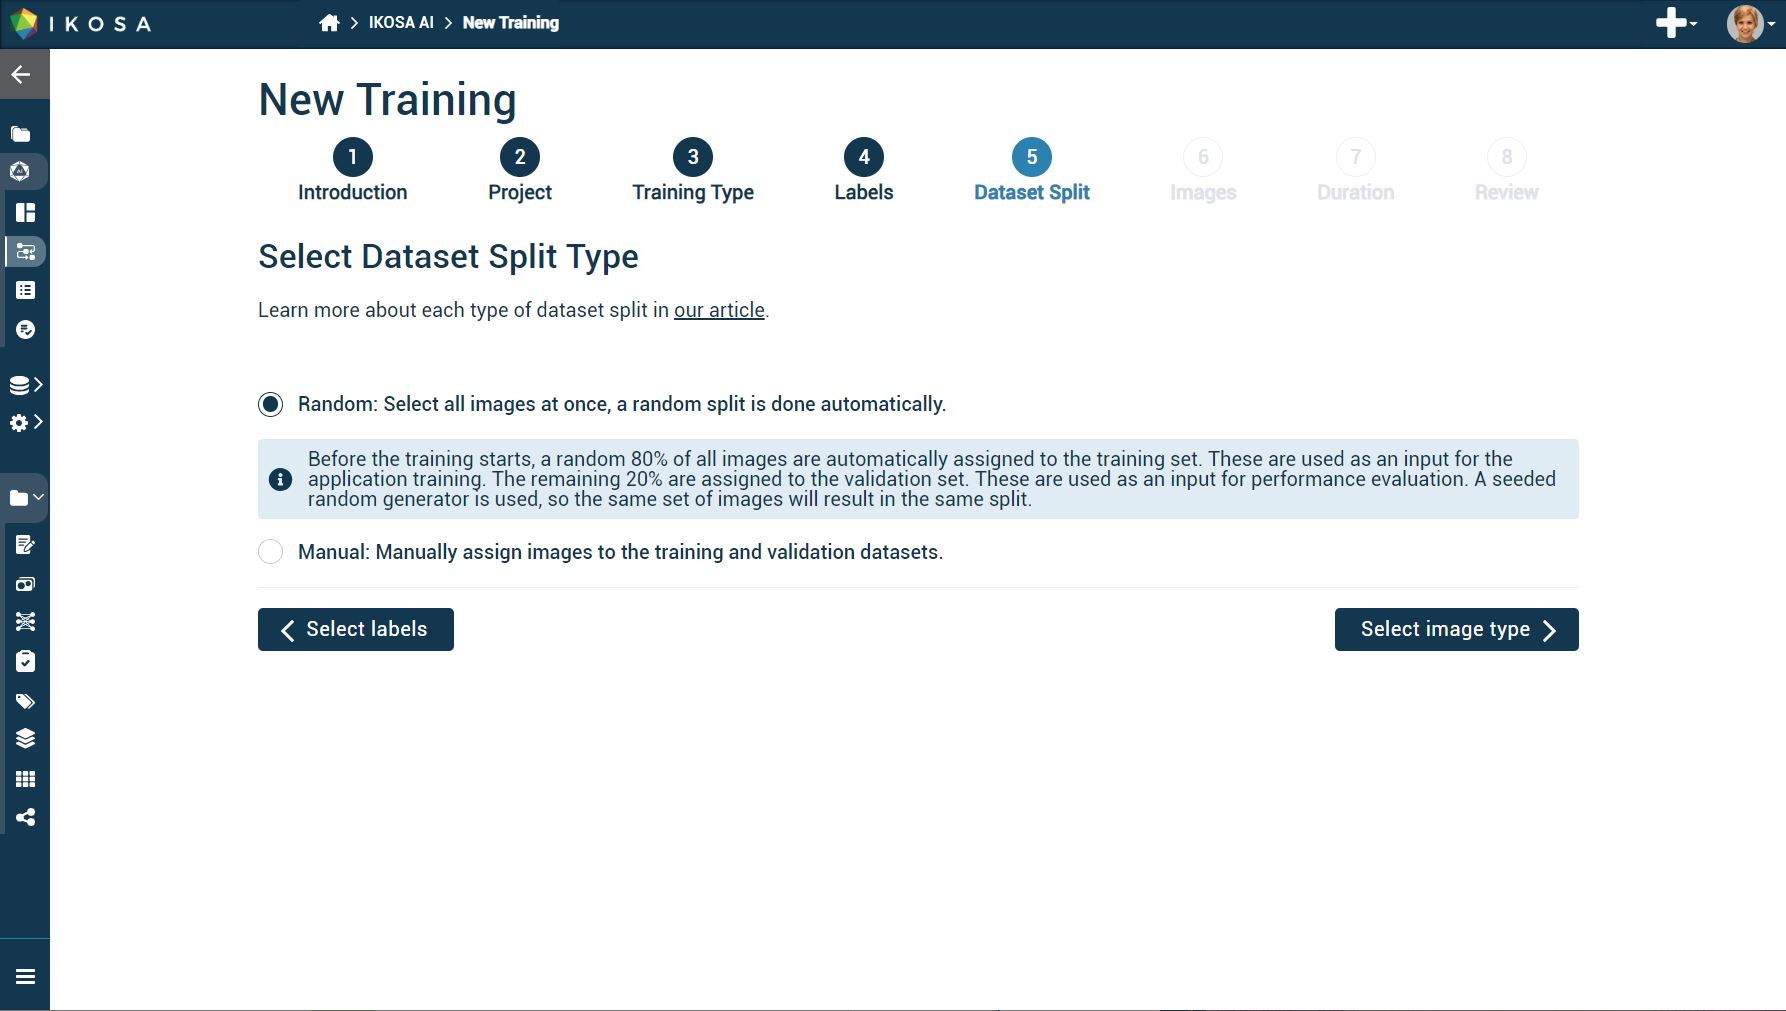
5. Select dataset split
Training images are used to train the app, while validation images are used to assess its performance.
Random dataset split | Manual dataset split | ||||
|---|---|---|---|---|---|
You select all images to be used in app development, and IKOSA randomly and automatically divides them into training (80% of the images) and validation datasets (20% of the images).
| Select at least 1 training and 1 validation image.
|
...
The quality of training and validation images plays a crucial role in achieving high app performance. Your expert opinion, as demonstrated in tasks such as annotations, holds particular significance during the validation process. Your input makes a difference in the app training process.
6. Select images
Choose between 2D and multichannel image type (only for instance segmentation)
...
Select whole images or images with ROIs.
| Note |
|---|
Important:If you have annotated parts of your images mostly within ROI(s), then you need to tick the option of training your application on ROI(s) instead of the whole image. If an image does not contain any ROI(s) but you still select this function, the whole image will be used instead. |
...
Select the “Performing the training on ROIs” option in the “Improve background recognition” section.
Choose your images.
| Note |
|---|
Important:Ensure that both background images or background ROIs contain only background, as any unintentionally included unlabeled features introduce misleading information into the trained application. |
| Note |
|---|
Important:If you have a mix of background images and images with background ROIs, ensure to select the option of “Performing the training on ROIs”. This way, if an image doesn’t have any ROIs, the system will use the whole image. |
...
7. Select training duration
Quick training is suitable for the initial app setup, while extended training is ideal for refining the app.
...
8. Review your selections and start the training
Review your selections before starting your application training.
Give your training a name and start it!
...
Wait until the training is completed
| Info |
|---|
Please note:Your training might be queued and an estimated time until the completion of the training is displayed. |
...
📑 Overview of the results
As soon as the training is completed, you will receive a notification email. Then you can view your results directly in the IKOSA or download them.
...
If you still have questions regarding your application training, feel free to send us an email at support@ikosa.ai. Copy-paste your training ID in the subject line of your email.
...
📚 Related articles
| Filter by label (Content by label) | ||||||||
|---|---|---|---|---|---|---|---|---|
|